


For every new release, the iPhone camera improves, which is no surprise since it is one of the most common devices. However, as image quality improves and resolution begins to climb, you require more storage space, so these files become much larger with RAW images so 4 K video support. Usually, there are other cloud resources including iCloud, Dropbox, Google Images, etc that allow us to coordinate images between PCs and mobile telephones. Furthermore, iTunes is also a perfect place to add data to your device, as an iOS user.These methods, though, are not more or less simple.In the article, we will share the guide on how you can transfer data from the computer from your iPhone.
Method 1: Use the Itunes to Transfer Data
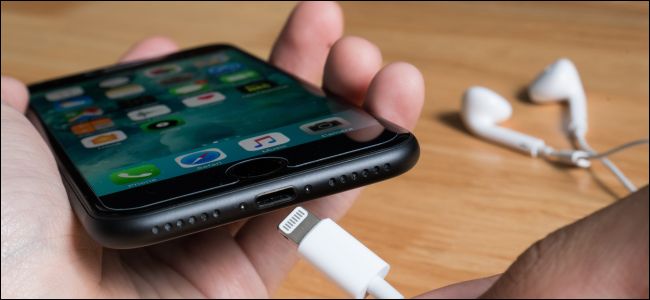
Step 1. Make sure that you enabled iTunes on your device, start it and then attach your iPhone X to the machine with a USB cable, tap Trust and enter your iPhone X lock screen password to let the device have access to your files. Make sure that the iCloud Photo Library is turned off on the iPhone X.
Step 2. Once iTunes has recognized your computer, press the icon at the top of the bar and then pick Images on your left. Image choice.
Step 3. Confirm Sync Photos, then pick the folder where your images have been stored, then sync All folders or specified directories, including whether or not videos are included. Finally, in the lower right click Sync.


Method 2: Transfer Data through Windows Explorer
Step 1. Download and activate Windows iCloud and restart upon installation on your device.
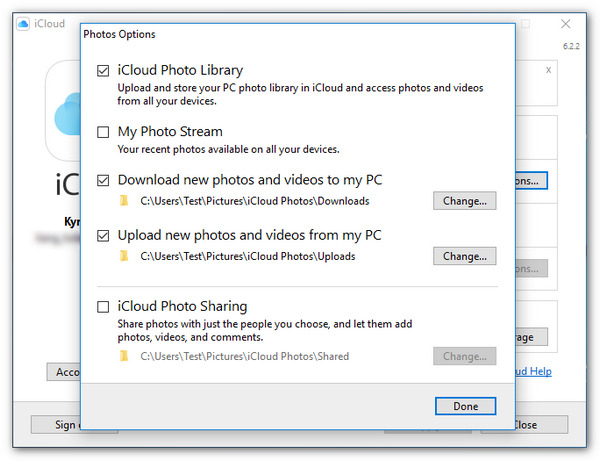
Step 2. Obviously, make sure you have activated the iCloud file and iCloud Picture Library on your iPhone X. The application would then be able to access it manually and sign up with your Apple ID after rebooting. Then you can pick the apps and items on your computers that you want to hold up to date, only search Photographs and click the Options button, search the pop-up book and add new Images and Videos from my Computer, press the Submit button and close it.

These methods, though, are not more or less simple. This article gives you another choice for the fast synchronization of your Desktop with iPhone X photographs. And we’re going to mention all of these approaches for the remainder of this article to help you move images from Desktop to iPhone X, and you can link any of them irrespective of whether you choose to use iTunes / iCloud or not.
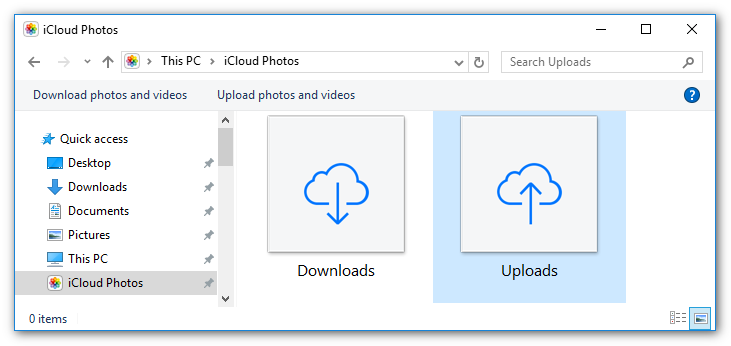

Step 3. You’ll add your pictures to your iCloud after a bit. You will also view them on your iPhone X’s Photos device.
Method 3:Use Google Photo to transfer Data
Step 1: Download the Google Photos mobile software and login, as usual, on your iOS computer, if you haven’t done so already.
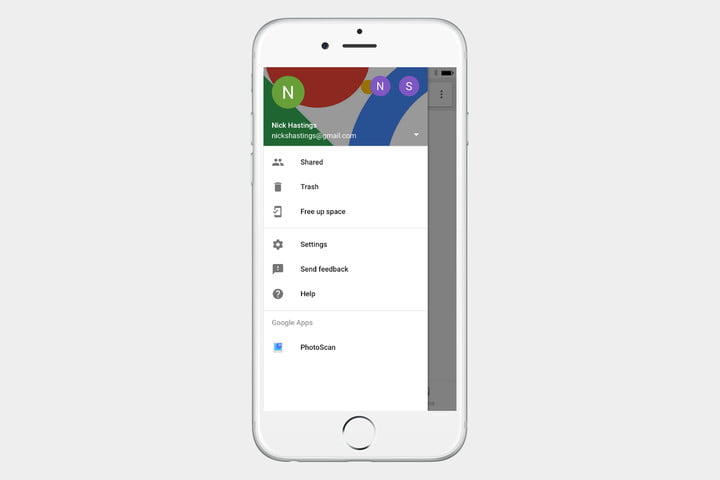
Step 2: Join the icon in the top-left corner, which is defined by three horizontal bars. Then, from the app, choose Parameters.

Step 3: In the Settings menu pick Saving & Sync and next to Backup & Sync turn the slider on to make it. When done, beginning the program would ask you to upload any photographs you have taken, as long as the computer is Wi-Fi enabled, as the last time the application is accessed. Slider next to Images with mobile phone backup if you like pictures to be stored with your data plan, too
Method 4: How to transfer data using AnyTrans for IOS
AnyTrans for iOs is a qualified iPhone Manager, skilled in transferring, backing up and managing the full output of your smartphone from one central location. It can be accessed fast and effectively. You can pass up to 1,500 photos to your computer in less than 3 minutes.
It is both Mac and Windows compatible. One of the most critical features that make this app favorite of most iPhone users is that it helps them not just to pass images but also to arrange them into categories. This is one functionality you can’t see on the market for iTunes and other iPhone managers.
AnyTrans for iOS is literally your best chance when you’ve been searching for a special device anywhere to better handle and send pictures to your machine. Before I teach you how to do it, here are several special features that differentiate iPhone managers.
Features
- Preservation: AnyTrans for iOS will not only pass images to your device, it also ensures their accuracy is preserved. No compression or image copies will be available.
- No Apple ID necessary. It is the perfect choice for you if you don’t want to sign in to iCloud using your Apple ID so that you can move pictures from your camera to your device.
- Online HEIC converter: It automatically converts your HEIC images to JPG formats while transporting to render these photos accessible on the screen, by using AnyTrans.
- Phone switcher: Having just received a new iPhone, AnyTrans would assist you in the transition without the hassle and you would like to transfer all your files and data from your former handset to your current one.
- Media downloader: You can appreciate this special AnyTrans feature of iOS, whether you’re the kind who enjoys watching videos or listening to songs online. You can access your favorite music and videos from such platforms as Twitter, SoundCloud, Vimeo, and over 100 others.
Tutorial
Step #1: Download and install AnyTrans for iOS
Check and update applications for AnyTrans iPhone Manager. Check and update the latest version. After you have activated the program, execute the app, and continue to do so.


Step #2: Launch and Connect to your iPhone
Open the iPhone App Store, then check for and update AnyTrans. After the installation has been completed, launch the program on your phone and your Laptop. Then attach the device and the iPhone via USB. Then on the AnyTrans home screen on your tablet, press “Content to PC.”
Step #3: Select photos by categories
Pick the images you want to pass after you’ve attached all apps. Whether personally or by group you may pick. Those may be files, my pictures or something
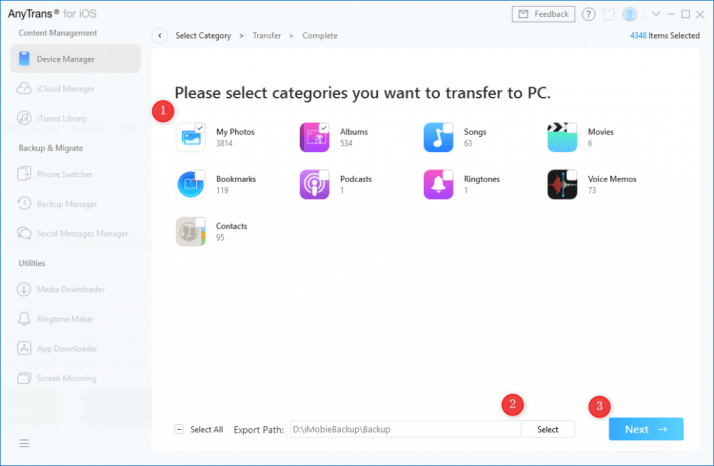

Step #4: Begin the transfer process
Next is to pick the output folder and then press the button “Pick” to choose the Right to launch the transition phase. When the switch is completed – usually you’ll have to bring images into the output folder you’ve picked in a few minutes.
Step #5: Enjoy your photos on your pc
Now, though you do have a free room on your iPhone you can enjoy your pictures. It’s just transparent. You may review this post here if your pictures from your iPhone to your Computer require support.
Conclusion
In this article, Method 4 gives you a more simple, easy, and versatile way to move any or several pictures from your iPhone to your device. Additionally, you’ll get nice support when it comes to iOS data transfer, file storage, and video access by equipping your device with Anytrans. Don’t skip this powerful application worth checking out with.