Summary: OST file is used by Microsoft Outlook as a local cache/offline copy of your live mailbox. This file can’t be opened in Office 365 directly. In this article, we have provided a DIY solution to open an OST file in Office 365. We have also offered a specialized software that can help you access OST in Office 365 with less effort and time.
Office 365 is a cloud-based Microsoft subscription service that offers several business apps, along with Outlook email client. Office 365 or Exchange Online is managed by Microsoft, thus there’s no need to have an infrastructure for managing the application and server. On the other hand, Office 365 is accessible from anywhere, provided there’s internet connectivity. Due to these and other benefits, many users prefer Office 365 over on-premises Exchange server.
Also, many users want to keep a copy of their Exchange mailboxes, stored in offline Outlook data file (OST), on Office 365 to access them anywhere. However, mailboxes stored in OST file cannot be directly opened in Office 365 as they’re a cache of mailbox on Exchange server and cannot be accessed without associated profile and Exchange server.
In this post, we’ve discussed ways that can help you open an OST file in Office 365.
How to Open an OST File in Office 365?
It’s not possible to access OST file in Outlook 365 directly. However, you can convert OST to PST and then open the converted PST file in Office 365. Here are the steps to do so:
Step 1: OST to PST Conversion 
You can convert the OST to PST by using the Outlook’s built-in utility – Import Export Wizard. Follow these steps:
- Open Outlook and go to File > Open & Export > Import/Export.

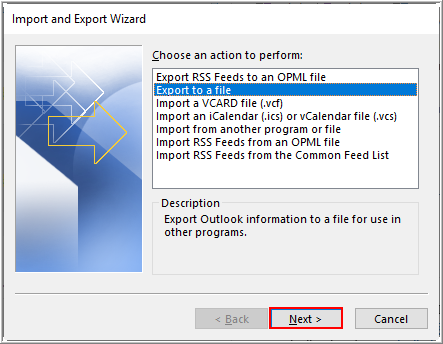
- In the Import and Export Wizard that opens, select Export to a file and click Next.
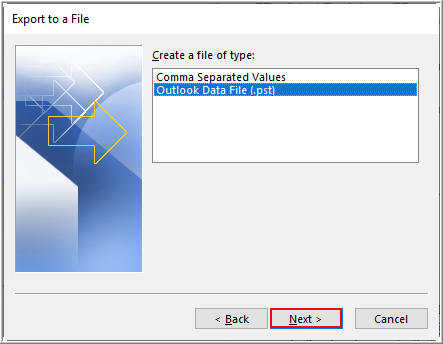
- Select Outlook Data File (.pst) and click Next.
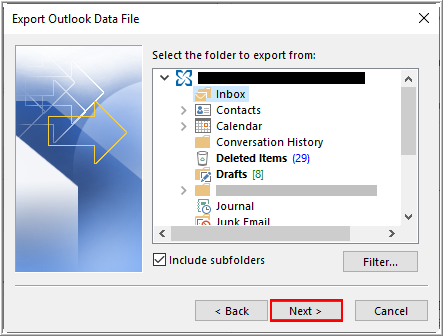
- Select the account email ID to export the entire mailbox. Else, select the individual folder that you want to export.
- Make sure Include subfolders checkbox is selected, and then click Next.
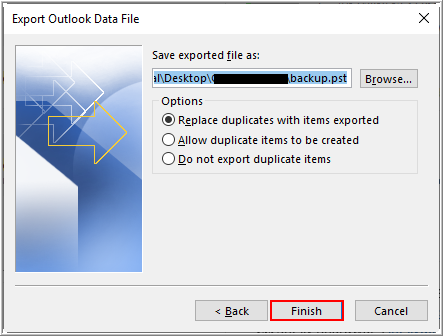
- Click Browse and enter location where you want to save the converted PST. Then click Finish.
Step 2: Import PST into Office 365
Once you have converted the OST to PST, import the PST file into Office 365. For this, you can follow any of these methods:
Method 1: Network Upload
You can upload the PST file to an Azure Storage location in Microsoft cloud. Then, use Office 365’s import service to import the PST file. For this, follow these steps:
- Access your Office 365 Admin Account and create a new import job. For this, go to Admin Center > Security & Compliance > Data Governance > Import > New import job.

- Create a name for the import job and click Next.
- Click Upload your data and then click Next.

- In the Import data page that opens, click Show network upload SAS URL. Copy this URL by clicking Copy to clipboard and paste it in a text file. You will need it later.

- Click Download Azure AzCopy. Download and install the utility on your system.
AzCopy utility allows you to copy any data to Azure Blob Storage. You can use the utility to upload your PST file to the Azure Blob storage. Then you can import the file to Office 365 by using Office 365’s import feature. You can refer to Microsoft’s guide on using network upload to transfer PST files to Office 365 for the complete process.
Method 2: Drive Shipping Service
You can use Microsoft’s drive shipping service to import PST into Office 365. For this, you need to copy the PST files on an external hard disk drive (HDD) and ship this drive to Microsoft data center. When the HDD reaches the data center, a technician uploads the PST files from the HDD to Microsoft cloud. You can then import the PST files from the cloud into Office 365 by using Office 365 Import feature.
Challenges with the Above Procedure
The above given manual process to open an OST file in Office 365 is time-consuming, cumbersome, and involves a risk of data loss. Some limitations of the manual process are:
- You have to first convert OST to PST, and then import this PST into Office 365 by either using network upload or drive shipping. This is a complex procedure and involves performing many steps.
- You need to be technically proficient to perform the process successfully.
- Uploading large PST files to cloud storage manually is expensive, if you use Microsoft’s Drive Shipping service. The company charges 2 USD per GB of data.
- It’s difficult to organize the converted PST files when there are a large number of employees. You need to determine which PST files belong to which employees, and then relink these files to the respective mailboxes after importing the PST files into Office 365.
- There are chances of malware attacks and data leaks, when you upload the PST files to cloud storage.
Automated Solution to Access OST File in Office 365
If you want a simple and direct solution to open an OST in Office 365, you can use a third-party software such as Stellar Converter for OST Technician.
Stellar Converter for OST Technician can convert multiple OST files to PST in a few easy steps. Moreover, the software can transfer OST files directly to your Office 365 account.
To open an OST file in Office 365 with Stellar Converter for OST Technician, follow these steps:
- Download, install and launch the software.
- Provide the location of the OST file.
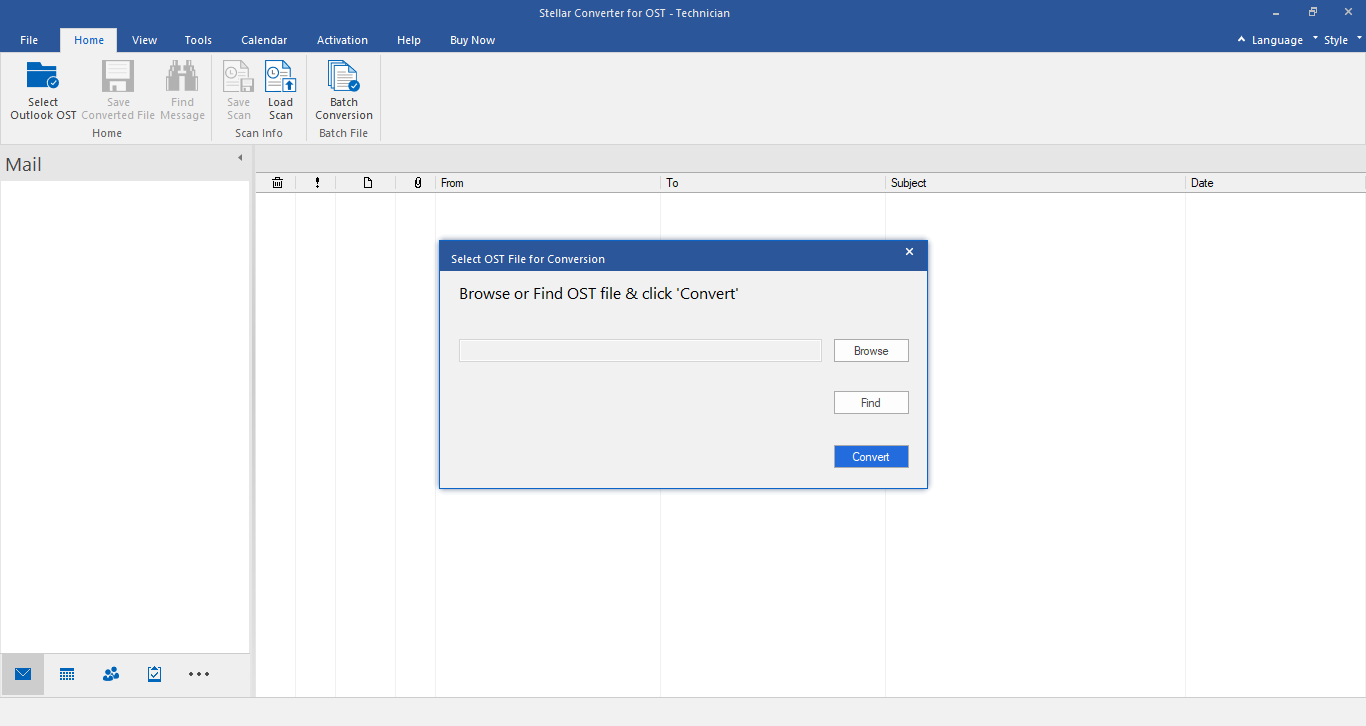
- Select the folders and files you want to transfer to Office 365.
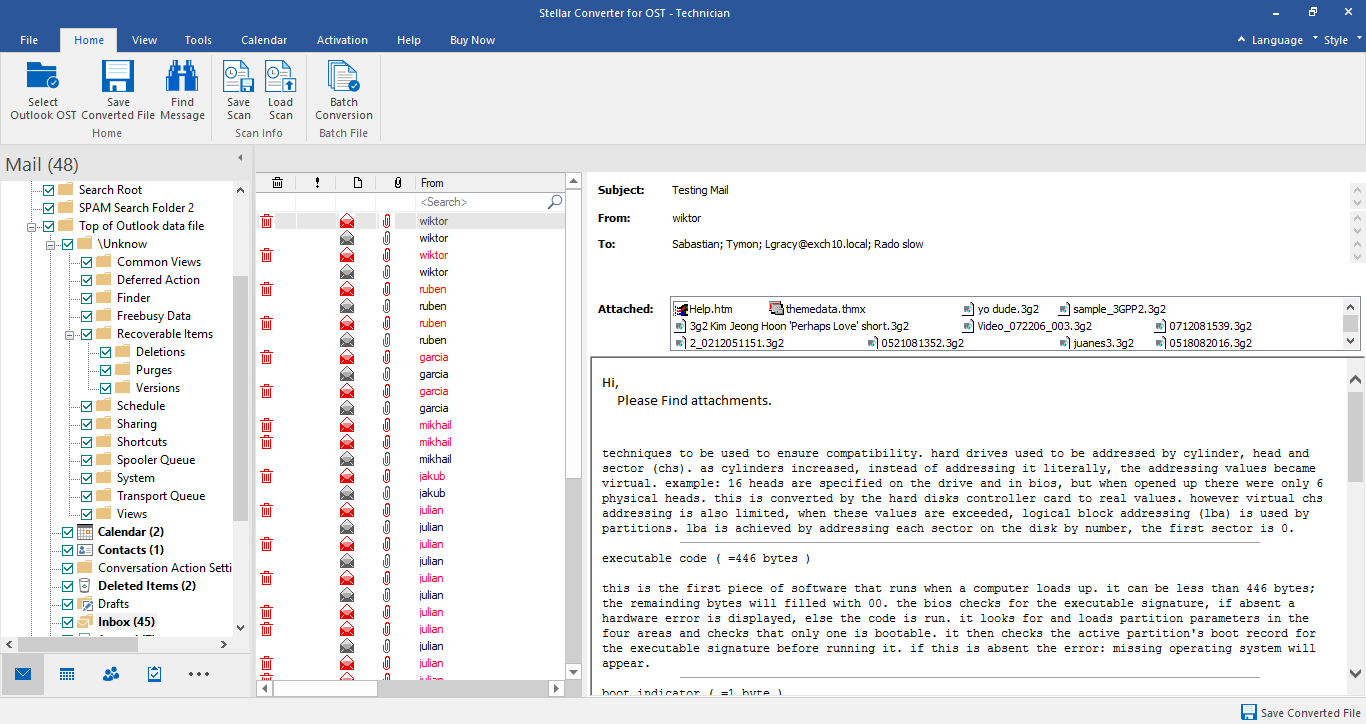
- Enter your Office 365 account details to initiate the transfer process.
Conclusion
If you want to open an OST file data in Office 365, there’s no direct way to do so. You need to first convert the OST to PST and then import it into Office 365 manually, which is a complicated and time-consuming process. Alternatively, you can use a third-party tool such as Stellar Converter for OST to directly import OST data to Office 365.


